
Wednesday, July 24, 2013
Top 5 Beauty Secret Weapons
You guys, I seriously got eaten alive by mosquitos when I shot this video, but I'm so glad I was able to get it done. These five products make a huge difference in my daily and weekly beauty routine as a busy mom and I hope at least one of these products can help you out as well! Enjoy!
DIY Hair Mask

Healthy shiny hair doesn't have to cost a ton of money. There are so many great all natural ingredients out there and you probably have most of them already in your kitchen. Next time your hair is feeling dry or damaged try out one of these hair mask recipes!
Avocado Mask (Looks and smells horrible, but works great!)
1 very ripe avocado
2 tsp of honey
1 Tbs olive oil
Mix all ingredients in a blender until smooth and apply to slightly damp hair. Leave on for 30 min and shampoo as usual. (This might be a good time for lather, rinse, and repeat)
Banana Mask
1 very ripe banana
1 egg
2 tsp honey
2 Tbs coconut oil
2-3 drops orange oil- optional
Mix all ingredients in a blender until smooth and apply to slightly damp hair. Leave in for 30 minutes and shampoo as usual. (I would again recommend shampooing twice as you don't want food particles drying in your hair)
Those are two of my favorite recipes, but you could also whip up a few eggs as a straight protein treatment. You could soften a chunk of coconut oil and apply that directly to your hair for moisture or add just the honey for shine.
Lace Belt Tutorial

Are you ready to make the easiest belt ever? Here is what you will need. A buckle. I found mine at JoAnn's right next to the elastic. Wide elastic to fit the size of your buckle. Mine was 2 inches. Fabric of your choice and lace.
One small note about the lace. You will notice that most lace has one straight edge and one scalloped edge. You don't want that. Look for some that has either two scalloped edges like mine, or two straight edges. That way your belt won't ever be upside down.

I didn't want white lace so after I got home I took out a few boxes of Rit dye I had laying around and...

15 minutes later I had some pretty charcoal grey lace. Except where the stitching was, it was more off white, but I actually liked having the dimension to it.

These are the lengths and amounts of fabric that I used for my belt, so of course you will have to adjust for your measurements, but it won't be hard. For the elastic I just measured it around my waist, added a tiny more for looping through the buckle and cut. My fabric was 6 inches wide ( I meant to cut it 7 inches wide though so I ended up just having to use a smaller seam allowance) and 8 inches longer than my elastic. If you want it bunchier than mine just add a few more inches. And you may have to sew two strips together if the standard 45 inch fabric isn't long enough, but that is totally fine. My lace was already somewhat gathered so I cut it only 4 inches longer than my elastic.

First step is to fold the fabric in half with right sides together and stitch along the raw edge. I also did a zig zag stitch to finish it off.

Turn the fabric right side out and then press so the seam is in the middle.

Attach a safety pin to your elastic and feed through the tube, just make sure the other end doesn't go up inside the fabric and get lost.

When you get to the end, center the elastic inside the tube and pin. Repeat on the other end. (Actually, what I should have done here just to have a more finished look is to tuck the raw edges in 1/4 of an inch, but I didn't. I won't dwell on that though.

Now stich across both ends and finish with a zig zag stitch.

When you are done, it should be nice and scrunchy looking, like this...

Now lay your lace fabric on top of the side without the seam and sew across each end.
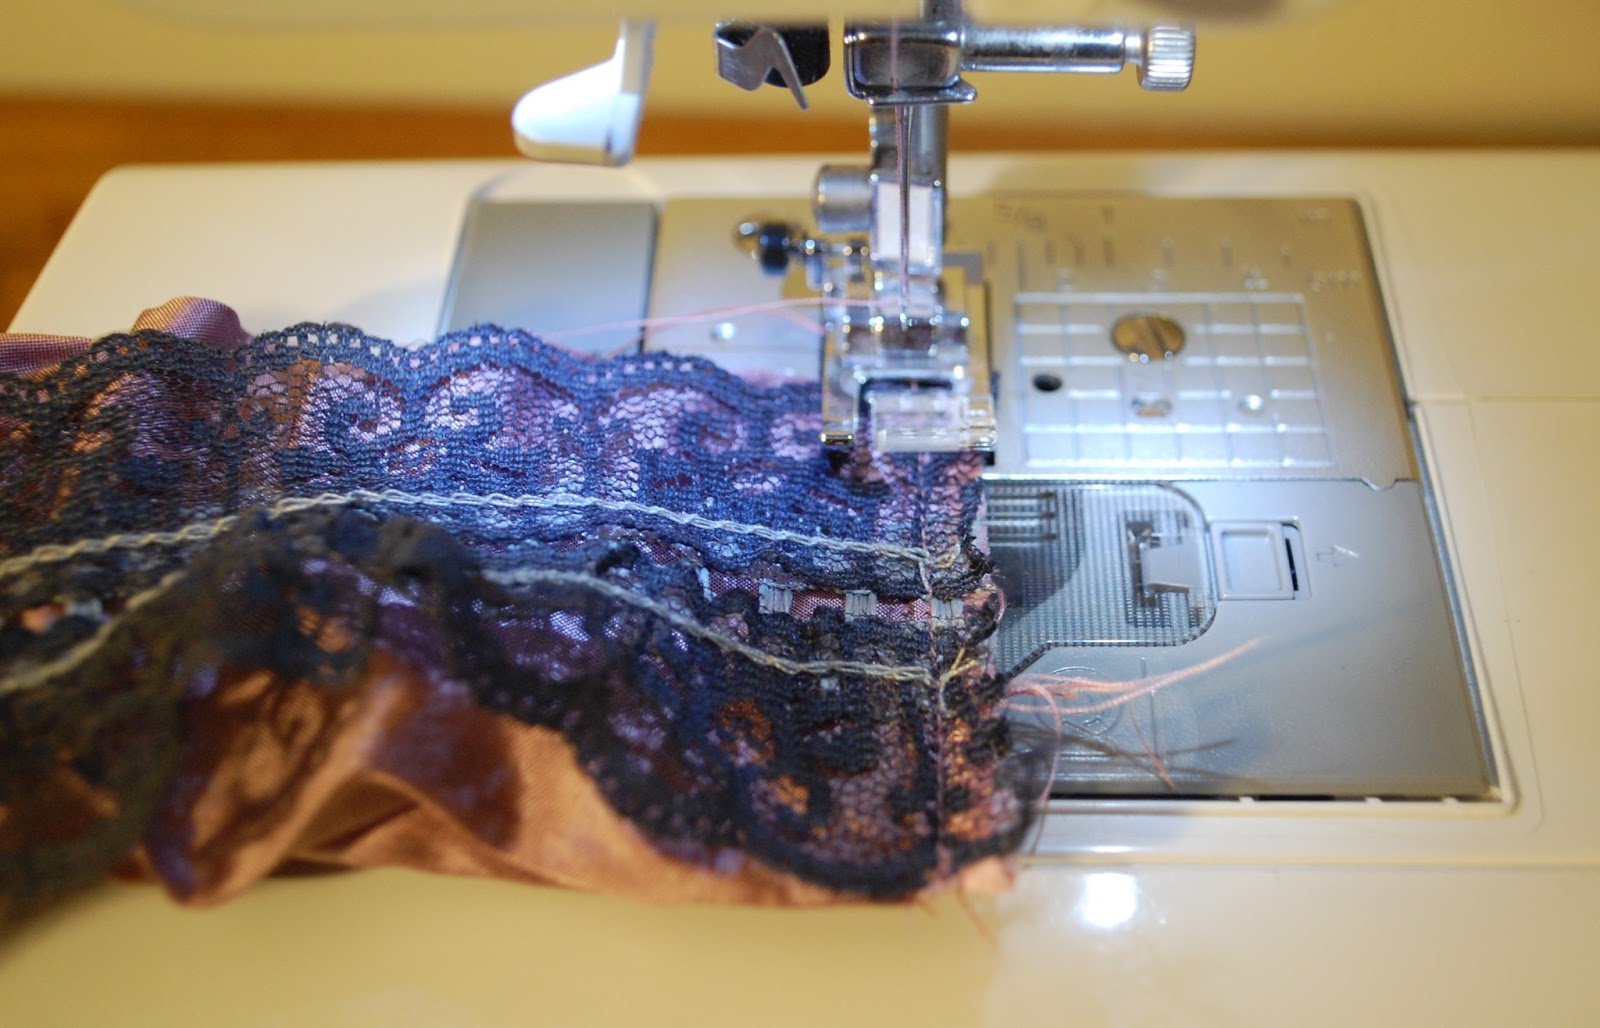
You should have something that looks like this

Now pull your elastic taut and pin in the center. It would be very helpful to have an extra set of hands at this point, but if you don't then just do what I did and use your knees! Now hold it in the center and pull one end taut and place another pin in the center of that section. Repeat on the other end. You should have 3 evenly spaced pins. This will make sure you lace gets evenly distributed.

Now, starting at one end, somewhere to the right of the center, sew a few stitches and a couple back stitches and then pull out from your first pin until the lace is all the way stretched out and sew down the elastic. When you get to the first pin, pull tight from the next pin and sew down, repeating until you get to the end. Then go back to the beginning and do the same thing all the way down the left side. The lace will lay down better if there are two sets of stitches instead of just one down the center.

Once the lace has been sewn on, just loop your ends through the buckle, pulling them until it fits snug around your waist and then hand stitch the ends to the back side of the belt. I also pressed my finished belt with a warm iron when I was done because my lace was popping out just a little more than I wanted.

And your done! Can you believe how easy that was?

Easy French Pedicure
This was a guest post I did over at Bloom on how to do an incredibly easy French pedicure (also works for manicures) Video tutorial coming soon...

Basic Hair Rope
For me, this hair style is as basic as a braid. And I'm pretty sure my mom taught me how to do it right after she taught me how to braid. I kind of assumed that everyone knew how to do a rope, until last week when I was talking to a friend. I had done my daughter's hair for church in THIS cute Valentines day hair style and she was telling me how she thought twisted hair was really cute, but it always came untwisted. So, I shared with her this quick little trick and it got me thinking. Remember when you were in school and the teachers would say "if you have a question, then most likely someone else has the same question." Well, even though a lot of you may already know how to do a rope, there are probably others like my friend who have never seen it done, so I'm going to give you the very basic how to...
I started this morning with a simple hair wrapped pony tail. The best idea ever, for doing a wrapped pony tail is also HERE.

Next, divide the hair into two sections and twist them both in the same direction. I always twist mine to the right.

After that, twist your two sections together in the opposite direction. Sorry about the blurry picture. That's what you get when your photographer is a six year old using a camera phone!

Tie it off at the end and your done. Basic and simple, but can be used in so many ways. I've actually tried doing a french rope before and it can be done, but it's pretty tricky. If I can ever get the technique simplified I'll post a video of it.

I started this morning with a simple hair wrapped pony tail. The best idea ever, for doing a wrapped pony tail is also HERE.
Next, divide the hair into two sections and twist them both in the same direction. I always twist mine to the right.
After that, twist your two sections together in the opposite direction. Sorry about the blurry picture. That's what you get when your photographer is a six year old using a camera phone!
Tie it off at the end and your done. Basic and simple, but can be used in so many ways. I've actually tried doing a french rope before and it can be done, but it's pretty tricky. If I can ever get the technique simplified I'll post a video of it.
Across The Back Tucked Under fFrench Braid {no bobbi pins needed}
And here is what my daughter's looked like before she ran around all day!

Subscribe to:
Posts (Atom)